
For: Dispatchers · Permission: Send Estimate · Time: ~5 minutes
Need a price for a customer or prospect with no service order? See Create an Estimate Without a Service Order.
Quick summary
- Open the order's Estimate tab.
- Price each work item: labor, parts and fees.
- Check the total and the line under it.
- Click the send button on the summary card. Its label depends on the total and your approval gates.
Before you start
- The service order is at Diagnosis Complete and has one or more work items from the technician's diagnosis.
- Where the estimate goes depends on your approval gates. See Understanding the Approval Gates.
Open the Estimate tab
On the service order, click Estimate. With the default approval gates, the Estimate Progress bar runs from Create Estimate through Customer Review, Wait for Repairs, Approve Repairs and Create Invoice to Invoice Sent.
Price each work item
Each work item has a Service section (the complaint and diagnosis), Notes, Labor and Parts.
The complaint and diagnosis text is often drafted by MetaFleet's AI from the technician's notes. It is marked with sparkles and "Generated from…". Click the pencil icon to edit it.
- Add labor. Click Add labor, pick the rate, set the start time and enter the hours. The Rate breakdown shows the price before you click Save.
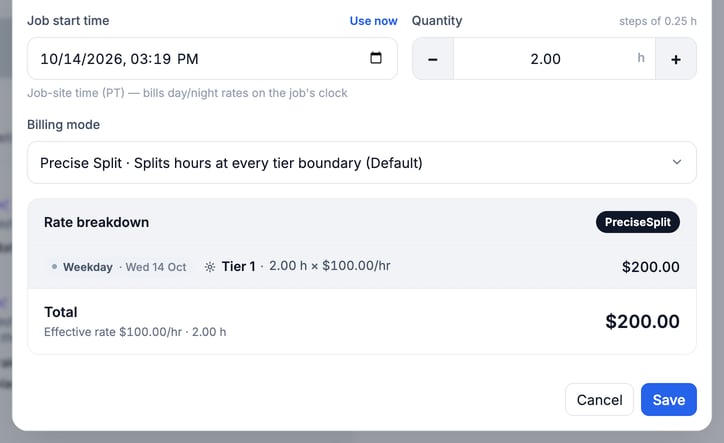
With time-based labor, the hours you type on each work item are priced together for the whole order. They show in the Labor Details card on the tab, under the work items and above the totals, not in the Labor Details window that Add labor opens. It starts closed, so click it to open it. Stated shows the priced hours and dollars, and the totals include it. Actual shows the time technicians were clocked in On Site. It doesn't change the price. Inside the card, click Show details to see each rate with its hours and amount. The start time is the expected start until a technician clocks in. Click Change next to Expected start to move it.
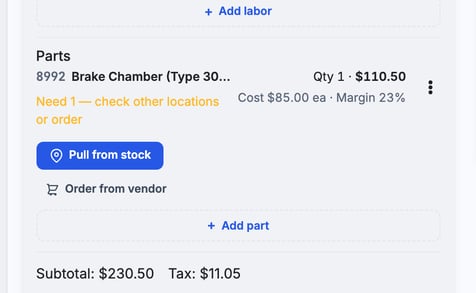
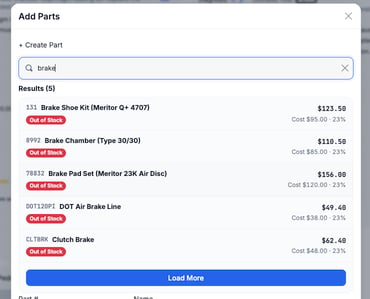
- Add a part. Click Add part, search for the part, pick a result, set the quantity, then click Update.
- Each part line starts with the part number (No part # for a one-off part). If you can view cost, the line also shows its cost and margin, for example Cost $85.00 ea · Margin 23%, and the search results show cost and margin too.
- To change a part, open the line's ⋮ menu and click Edit. The Edit part window shows Part #, Quantity, Cost each, Price each and Line total, with the margin under it if you can view cost.
- Until the estimate is sent to the customer, a part's price follows the catalog (cost × markup). It locks once the estimate is sent to the customer or the order is closed for edits. Older part lines keep the price they had, and a price someone typed never moves.
- A kit can be priced as a whole, with its parts shown as Included in kit; otherwise each part is priced on its own.
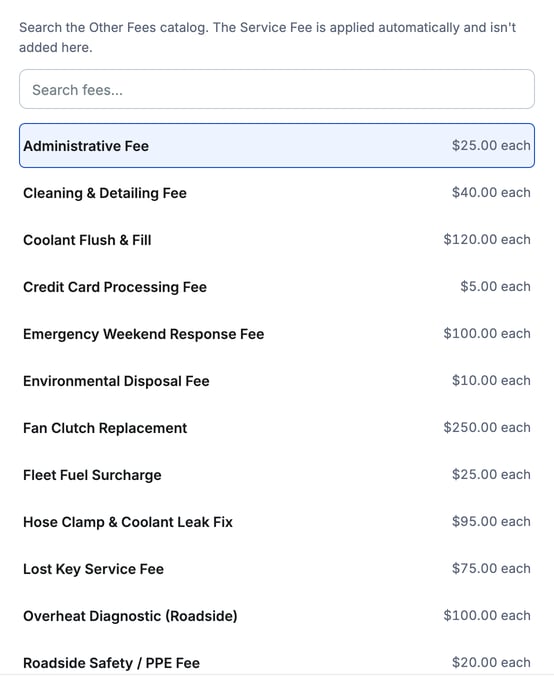
- Add fees. Click + Add fee in the Estimate card.
- Pick one or more fees from the list. A fee already on the order is grayed out and tagged On this order.
- Each fee you pick goes into the panel at the bottom with its quantity and Price each, which starts at the fee's set price. Change it to charge a different price on this order, or click Reset to go back.
- Click Add fee, or Add 2 fees (and so on) when you picked more than one. If a fee doesn't go on, the window stays open and says which one.
- To change a fee later, click Edit on its row. A fee at a changed price shows a Custom price tag that only your team sees.
Click Add work item if the diagnosis missed something. It opens a card where you write the Complaint, then the Cause & Correction (the diagnosis), then click Finish. A work item needs both before it can be added, including one added through the AI assistant. To remove an unfinished New Work Item card, click its trash icon and click OK on Delete Work Item. The Vehicle Details block at the bottom of the tab shows the unit. Click Edit vehicle to correct it.
Check the total and where it goes
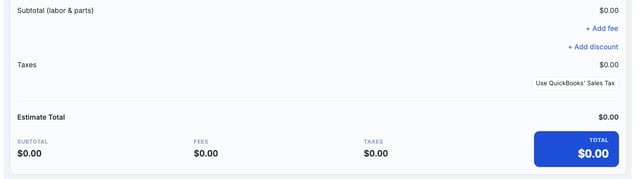
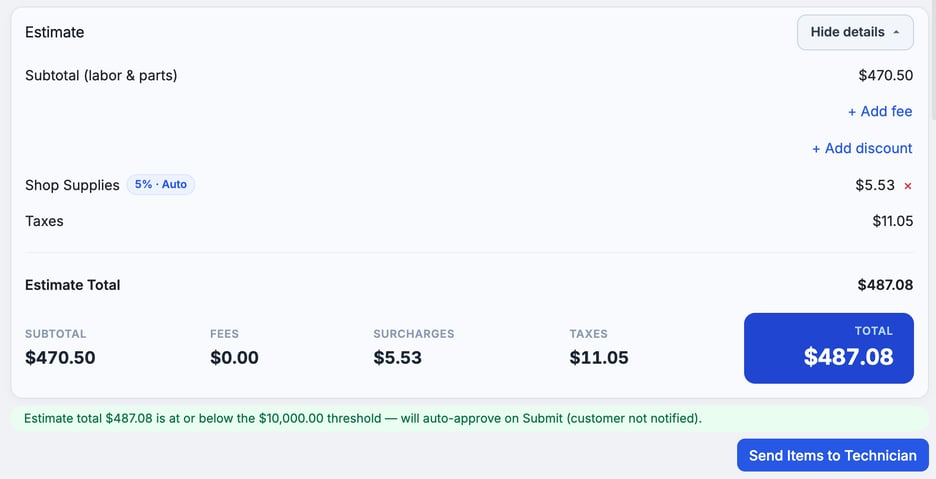
The summary card shows Subtotal, Fees, Surcharges, Taxes and Total. A line under the total says where the estimate goes when you send it. It compares the total with the customer's auto-approval threshold.
If your company uses QuickBooks Automated Sales Tax, click Show details while the tax can still be edited. Under Taxes, click Use QuickBooks' Sales Tax to use the tax QuickBooks works out. To go back, click Use MetaFleet's Sales Tax. Your choice carries to the PDF, the email, the approval page, the approval threshold and the Invoice tab. If you change the estimate afterward, the tax goes back to MetaFleet's until you click the button again.
Send the estimate
Click the button under the summary. Its label follows the total and your approval gates:
| What the line under the total says | Button | What it does |
|---|---|---|
| The total exceeds the customer's threshold: the line ends with will be sent to customer for approval on Submit | Send Estimate to Customer (Update Customer Estimate once an estimate exists) | Emails the estimate to the customer for approval and sends a text with the same approve link. |
| The total is at or below the threshold: the line ends with will auto-approve on Submit (customer not notified) | Send Items to Technician | Releases the work to the technician. The customer is not asked. |
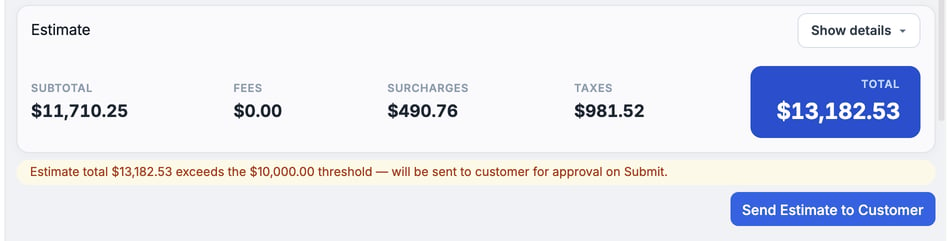
Over the customer's threshold, the button is Send Estimate to Customer. The email goes out as soon as you click. There is no confirmation step.
When every job is declined, approved or already under way, the button is grayed out. The reason under it reads Nothing new to ask about. Add work, or Resubmit a declined job. Send to Manager for Approval is refused the same way.
A work item can't be sent, approved or skipped until it has a complaint and a diagnosis. The send buttons stay off and name the work item, for example "Inspect Brakes Pulling Left" still needs a complaint and a diagnosis. With more than one, the message reads 2 work items still need a complaint or a diagnosis and lists them. Click Go to it to jump to the work item. Skip Approval is refused the same way.
When the work is approved without the customer, the Estimate card banner reads Auto-approved. Go ahead with the repair. It reads Approval was skipped only when someone used Skip Approval.
To ask the customer to approve even when they don't have to, for example when the total is under their threshold, use Send for approval on the Estimate card. See Send an Estimate for Approval When It's Under the Threshold.
If manager approval for estimates is on, the estimate goes to a manager first. A dispatcher sees Create Estimate (a PDF only) and then Send to Manager for Approval. A manager sees Approve Estimate and Reject Estimate. Everyone else sees a disabled Awaiting Manager Approval. See Manager Review and Reject an Estimate. Read the line under the total before you click.
Where the estimate goes
Your approval gates and the customer's threshold decide the route. Find your setup in the table. The gates are on Settings › Workflow › Approvals & Alerts, in the Service Order Settings card. For the full picture, see Understanding the Approval Gates.
| Your setup | What happens |
|---|---|
| Customer approval is required before work can begin is Off | No estimate email goes to the customer, whatever the total. Work starts right away, unless a manager or dispatcher step is on. |
| Customer approval On, total at or under the threshold | The estimate is approved automatically. The customer is not told. |
| Customer approval On, total over the threshold | The customer gets the estimate approval email and decides. |
| Require Manager Approval for Estimates On | A manager reviews first. The customer step follows only if the total is over the threshold. |
| Estimates require Dispatcher approval before sending to Customer On | Nothing goes out when diagnosis is finished. The order waits at Diagnosis Complete until a dispatcher checks the estimate and sends it on: to a manager, to the customer (over the threshold) or to the technician. |
| No contact on the order can receive the email | The estimate is held, and the shop users on the order get one email about it. It goes out on its own once you add a contact who can receive it. You can also click Send Estimate to Customer after adding one. If someone clears a work item's complaint or diagnosis, the held banner goes away and the button is grayed out, with a line naming what's missing. Fill it in, then click Send Estimate to Customer. It no longer goes out on its own. |
What your customer gets
The customer gets the estimate approval email with a button that opens the estimate review page. They do not need to sign in. The estimate-ready text has the same Approve link. A contact who isn't allowed to approve estimates gets the text without a link. They approve or decline each line, add a reason for any line they decline, and send their decision. If the link has expired, click Resend Approval Email to send a fresh one. See Approve or Decline an Estimate.
When the customer approves by phone
While you wait, each work item reads Waiting for customer. Mark Customer Approved? If the customer says yes by phone, click Skip Approval on that work item. This approves the work item without the customer's own decision, so use it only when you have their word.
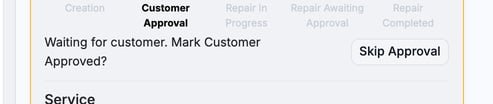
- Click Skip Approval.
- Confirm the question Are you sure you want to approve this work item for repair? by clicking OK.
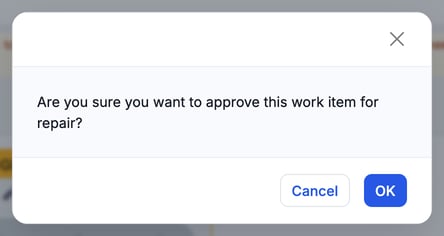
The banner changes to Approval was skipped. When the total is over the limit, it names the total and the limit, then says Go ahead with the repair. Skip Approval only stands in for the customer's approval of the estimate; any later step your shop requires still applies.
After you send
When the estimate goes to the customer, the card changes to Awaiting customer approval. Repair work cannot begin until the customer approves. The estimate card offers Resend Approval Email while you wait. It sends a new estimate with your latest changes, and that estimate replaces the one the customer has. The link in the earlier email stops working: it opens This estimate isn't available and tells the customer to check their email for the current version. If the labor price changes after you send, the card adds a line: Labor re-priced since: the customer now sees the new total.
When the customer approves, the work starts. Nobody has to release the technician after it. The banner on the Estimate tab names who answered, with their email and the time, for example Approved by Jordan Lee (jordan@yourcustomer.com) · Oct 13, 4:12 PM. A decline reads the same way. The Estimate History section shows the same name, email and time in the Customer's answer column for each estimate.
If you change a work item after sending, it is marked CHANGED and the summary shows the new total. The Estimate History section at the bottom of the tab keeps earlier versions. The banner still shows the total that was sent, so the customer decides on the sent version until you update it.
If you change a job the customer declined, it shows CHANGED - NOT SENT and the Estimate card shows Resubmit (or Resubmit 2 jobs, and so on). It needs the Send Estimate permission or the all-orders admin right. Click it and confirm Resubmit to the customer?. One email goes to the customer about only the changed declined jobs. Approved jobs stay locked, and the technician keeps working on what is already approved. If manager approval for estimates is on and a price went up, a manager approves it first. If no price went up, no manager approval is needed.
Who receives the estimate
The email goes to the contacts assigned to the order. Open the order's Details tab and check Members & Contacts. A contact with the Authorizer label can approve estimates. If the customer must approve and no contact has a valid email, add one with Add member or contact before you send. If you send without one, the estimate is held. Add a contact with a valid email, then click the send button again.
The service fee
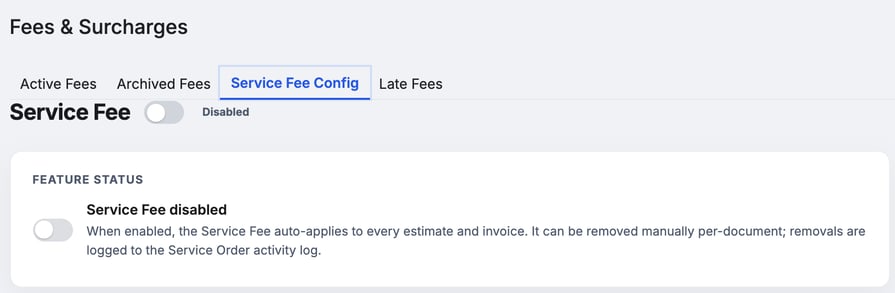
Besides the fees you add on the Estimate card, your shop can turn on a tenant-wide Service Fee. When it is on, it applies to every estimate and invoice. You can remove it from an order, and the removal is logged. A removed Service Fee stays off, even when the invoice is created. See Add a Service Fee to Every Order. Set it up under Settings › Fees & Surcharges, on the Service Fee Config tab.
Troubleshooting
| Symptom | Likely cause | Fix |
|---|---|---|
| The button reads Awaiting Manager Approval, or there is no send button | The estimate is with a manager or with the customer | Have a manager approve it, or use Resend Approval Email for the customer. |
| The estimate never reached the customer and the order shows it is held | No contact on the order can receive the estimate | Add a contact with a valid email on the Details tab (enterprise customers: one with the Authorizer role). The estimate goes out on its own, or click Send Estimate to Customer. |
| The total looks wrong | A labor rate, quantity, part or fee is off | Open the work item and adjust Labor or Parts, or click Edit on the fee row in the Estimate card. |
| The customer did not get the estimate | The total is at or below the threshold, or no assigned contact has a valid email | Read the line under the total. Add a contact with a valid email on the Details tab. |
FAQs
Can I add a work item that wasn't in the diagnosis?
Yes. Click Add work item on the Estimate tab.
Can I download the estimate?
Yes. On the Estimate card, click View estimate to open the PDF in a new tab, or Download PDF to save it. Both show the current work items and work before anything is sent. They do not email the customer or change the order.
How are labor hours rounded?
Hours are rounded once per order, to your shop's rounding step. See Choose How Labor Is Rounded.
Where do labor rates come from?
From your configured rate types, such as Tier 1 Rate. The Rate breakdown in the labor window shows how the hours are priced.