
For: Dispatchers and managers · Permission: Send Estimate · Time: ~5 minutes
Use this when a customer asks what a job will cost and you don't have a service order yet. If the customer says no, nothing is left behind except the estimate. To estimate work on a service order that a technician has already diagnosed, see Build and Send an Estimate.
Quick summary
- Press ⌘K, type estimate, and choose Create Estimate.
- Pick the type of work and the customer.
- Check Approval goes to, the vehicle and the service location.
- Add a work item with labor, parts and fees.
- Click Send estimate. When the customer approves, click Put on the schedule.
Before you start
- The customer needs at least one contact with a valid email address. The estimate goes only to the contact chosen under Approval goes to.
- If the customer is an enterprise account, the contact also needs a role that is allowed to approve estimates (Authorizer in the demo). Set roles on the contact's page, under Contact Roles.
- Know which truck the work is for. You pick it from the customer's vehicles.
Start the estimate
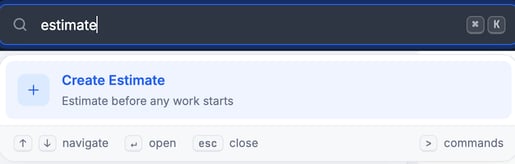
Click the search bar at the top (or press ⌘K), type estimate, and choose Create Estimate. The new estimate page opens.
- Pick the work type. Choose Repair. This article covers repair estimates. PM and Inspection estimates cover several vehicles and aren't covered here.
- Pick the customer. Search by company name and click the company. MetaFleet saves a draft and gives it a number such as
261014-HLC-0069. For a company that isn't in MetaFleet yet, choose + Create a new customer in the search results instead.
Until you click Put on the schedule, the estimate never reaches the schedule or the technicians. No work starts until the customer approves it.
Set who approves, the vehicle and the service location
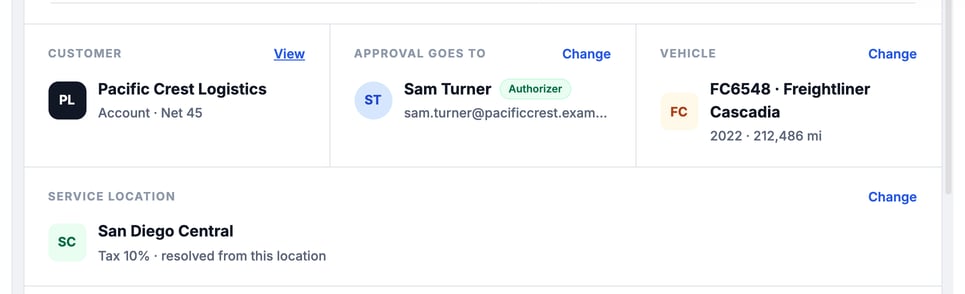
Three cards sit under the customer name. Each has a Change link. On Approval goes to, until the customer approves, Change shows only if you have the Send Estimate permission or manage all service orders.
- Approval goes to: the contact who receives the estimate. A contact with no valid email address can't receive it. For an enterprise customer, the contact also needs the Authorizer role.
- Vehicle: the truck the estimate is for. Click Change to pick a different truck.
- Service location: the service area. It decides the tax on the estimate.
Add a work item
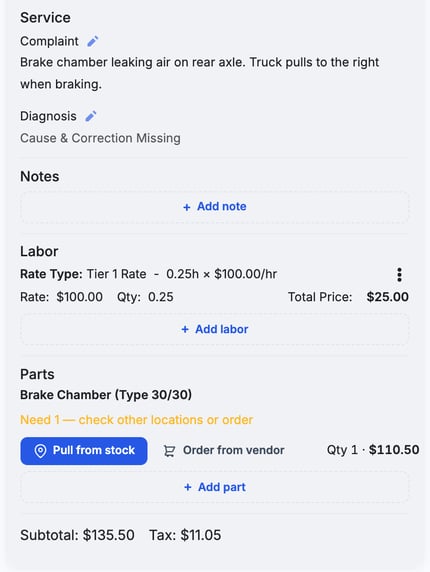
Under Work Items, click Add work item. A card opens where you type the Complaint (what the customer reported), then the Diagnosis (cause and correction). A work item can't be added without both a complaint and a diagnosis. Use Add work item again for each extra job.
Add labor
- Click Add labor on the work item.
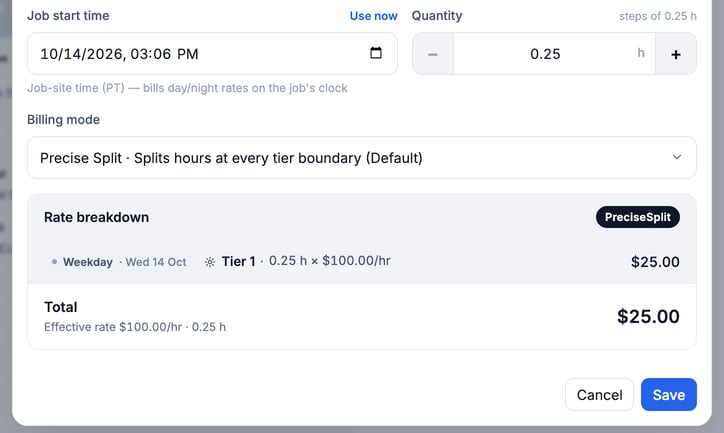
- Under Rate source, leave Time-based selected to bill by your day and night tiers. Choose Custom to type an amount.
- Set the Job start time and the Quantity in hours. The quantity moves in steps of 0.25 h.
- Leave Billing mode as it is. Check the Rate breakdown and click Save.
Add parts
- Click Add part on the work item.
- Search by part name or number. Each result shows the part number, name, price and stock status.
- Click the part, check the Price and Quantity, and click Update.
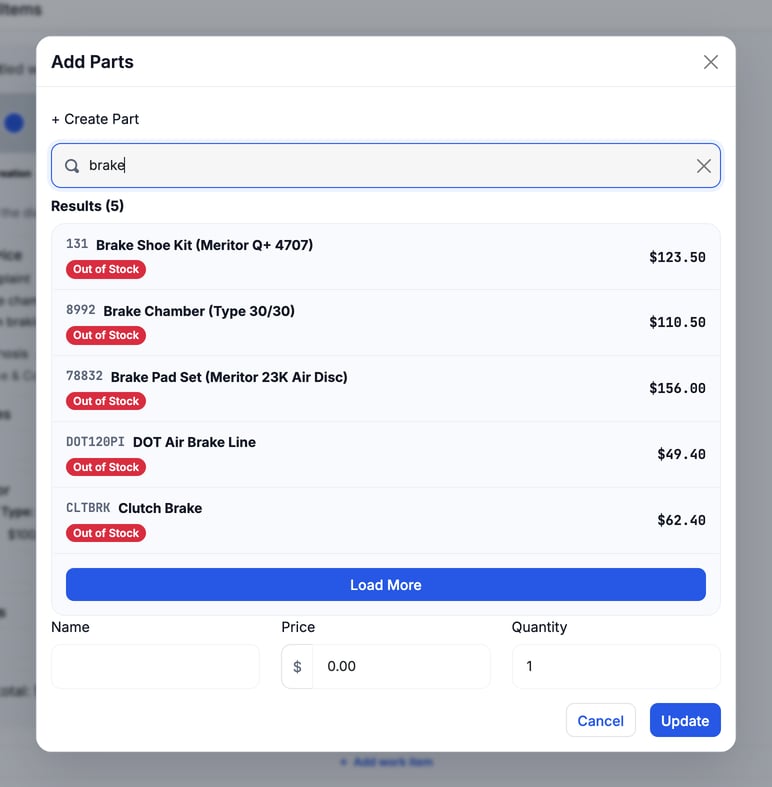
If a part is out of stock, the part line shows Pull from stock and Order from vendor.
Add fees and check the total
Click Show details on the Estimate card. From there you can:
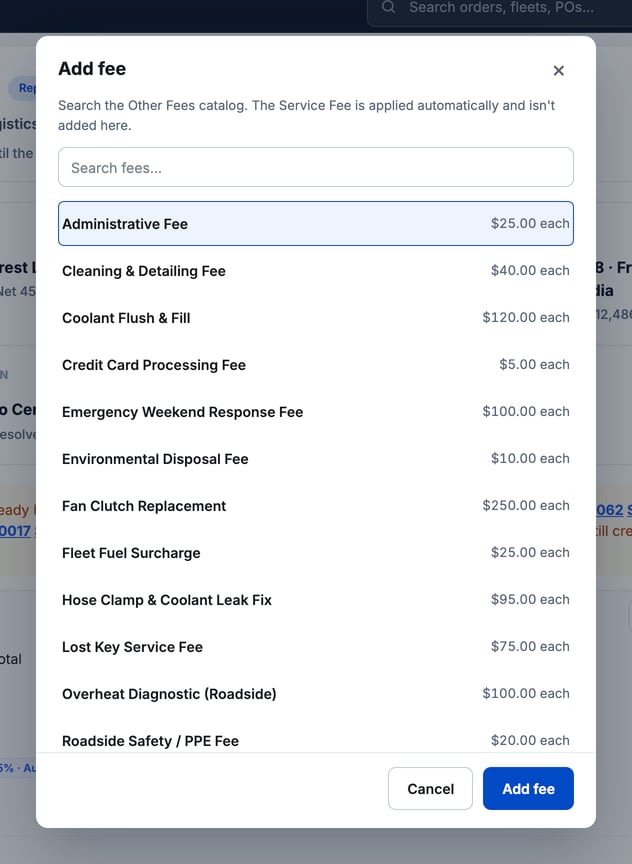
- Click + Add fee and pick one or more fees. Each one goes into the panel at the bottom with its quantity and Price each. To charge a different price on this estimate, change Price each. Then click Add fee, or Add 2 fees (and so on) for more than one. To change the quantity or price later, click Edit on the fee line. A fee at a changed price shows a Custom price tag that only your team sees. Click × to remove it.
- Click Add discount to take an amount off. It comes off the whole order (labor, parts, fees and surcharges) before tax.
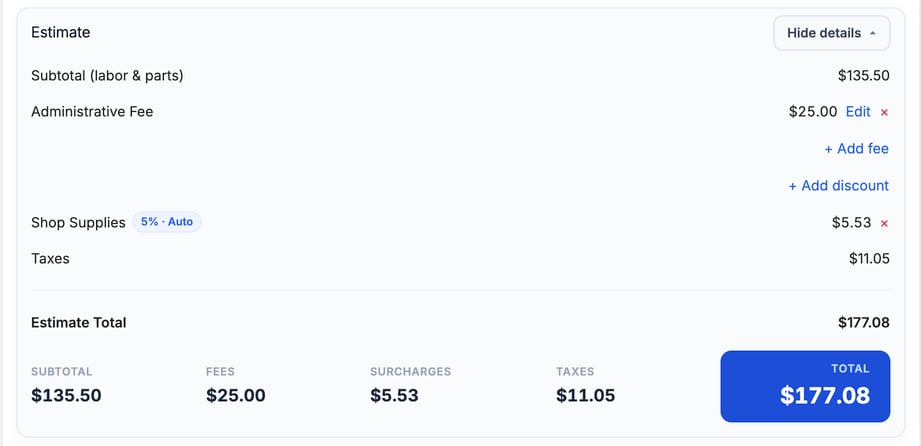
The card shows SUBTOTAL, FEES, SURCHARGES, TAXES and TOTAL. They update as you edit. A line such as Shop Supplies is added by a surcharge rule and has its own ×.
Where the estimate goes
A standalone estimate always goes to the customer. The auto-approval limit and the Customer approval is required before work can begin setting don't apply to it, so a small total isn't approved on its own. No manager or dispatcher approval applies to it either, even if your shop has those gates on. The gates apply once the job becomes a service order. See Understanding the Approval Gates.
Send the estimate
The buttons sit at the top right of the page, level with the title. Click Preview to see what the customer gets, then click Send estimate. If the button is off, the banner under it lists what is still missing, such as the customer, someone to approve it, the service location or a priced line. Hover over the button to see the same reason.
Follow the estimate while it waits
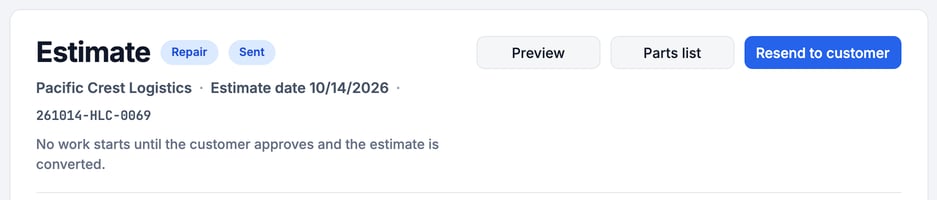
After you send it, the status at the top changes to Sent and a banner reads Awaiting customer approval. Repair work can't begin until the customer approves.

The bar at the bottom of the page shows when the email went out, whether the customer has opened it, and when the link expires. The link works for 48 hours.

To send it again, for example after the link expires, click Resend to customer at the top right. After you send or resend, a message names who it went to and when. If you change the estimate after sending, a note tells you the customer is holding the earlier total. Resend so they see the new one.
What your customer gets
The customer gets the estimate approval email. It has your shop's name and logo, the headline Your estimate is ready for approval, a summary with the total, and the estimate as a PDF. The email has one button, Review your work to approve. It opens the estimate review page (titled Review your estimate) without signing in.
- The customer also gets a text with the same approval link. A contact who isn't allowed to approve estimates gets a text with no link.
- The page lists every work item with its parts and labor, and the totals.
- Each item has Approve and Decline. When there is more than one item, Approve all and Decline all save time.
- For a declined item, the customer can say why. The reason goes back to your shop.
- The customer types their name and email, then clicks Send my decision. The page then reads Your decision is sent.
- The link works for 48 hours. If it has expired, the page reads This link has expired and offers Sign in to see your estimate or a call to your shop. Click Resend to customer to send a fresh link.
- A customer who opens the link again after deciding sees that the estimate already has their decision, and is told to call your shop to change it.
More on the customer's side: Approve or Decline an Estimate.
When the customer decides
The status at the top and the banner update to match the customer's answer. If the customer approves some items and declines others, the approved items count as an approval. The banner names who answered and when.
- Approved: the banner reads Approved and the main button becomes Put on the schedule.
- Declined: the banner reads The customer declined this estimate, which means every item was declined. The declined version stays on record. Change a declined item or add work, then click Revise & resend. The customer is asked again only about the declined items you changed. With nothing new, MetaFleet says Nothing new to ask about. Change a declined job or add work first.
Put an approved estimate on the schedule
Click Put on the schedule at the top right. If the estimate has no vehicle or service location, the banner says what to pick first and the button stays off until you do. The estimate becomes an unscheduled job that waits for a date. A line under the bar confirms it, with an Open the schedule link. Give the job a date and address there. The price the customer approved follows the job to the order.
It doesn't become a live service order until the job is scheduled and the truck arrives. If the customer declines, nothing is left to clean up.
The Service Fee
Your shop can turn on a Service Fee that is added to every estimate and invoice. You don't add it from the Add fee list. It is set up on the Fees & Surcharges page, on the Service Fee Config tab.
Troubleshooting
| Symptom | Likely cause | Fix |
|---|---|---|
| Send estimate is off | No approver with a valid email address is set | Click Change under Approval goes to and pick a contact who has a valid email address. If you don't see Change, ask your admin for the Send Estimate permission. |
| Approval goes to still says "No contact yet" after you pick a contact | The contact has no valid email address, or the customer is an enterprise account and the contact's role isn't allowed to approve estimates | Fix the email on the contact. For an enterprise customer, open the contact and turn on the Authorizer role under Contact Roles. Then pick the contact again. |
| The customer says the link doesn't work | The link has expired | Click Resend to customer. |
| Sending is refused with "Nobody on this estimate can receive it" | No contact has a valid email address | Add a contact with a valid email address, pick it under Approval goes to, then send. |
| Put on the schedule isn't there | The customer hasn't approved yet | Wait for the approval, or resend the estimate. |
FAQs
Does an estimate create a service order?
No live service order. The estimate is a draft with its own number. Technicians and the schedule don't see it until you click Put on the schedule.
What if the customer says no?
Nothing else is created. The declined estimate stays on record. If the customer wants another price, change a declined item or add work, then click Revise & resend.
Can I save it and send it later?
Yes. MetaFleet saves a draft as soon as you pick the customer.
Where is the estimate PDF?
Click Preview. You can read and save the PDF from there.