
For: Admins and team leads · Permission: Manage customers (Manage bypass threshold to set the auto-approval threshold) · Time: ~5 minutes
Quick summary
- Go to Company Details › Companies and click + New Customer.
- Enter the company name and choose CoD or Account.
- For an account customer, pick the payment terms. Add a billing address and an auto-approval threshold if you want them now.
- Click Create company, then add the first contact.
- Click Finish & open customer and check Company Size.
Before you start
- Have the company name. Everything else can wait.
- For each contact, have a name and an email. A contact needs an email before you can give them a role.
- Know how the customer pays: per job (CoD) or on a bill with terms (Account).
Open the New Customer window
In the sidebar, open Company Details › Companies. Click + New Customer. The window has two steps: Company and Contacts & Vehicles.
Name the company and choose how it pays
- Company name: type the name. This field is required.
- Customer type: choose one.
- CoD (charge on demand): the customer pays per job. No terms are needed.
- Account (billed account customer): you invoice the customer. Pick Payment terms: Due on receipt, Net 10, Net 15, Net 30, Net 45, Net 60 or Custom….
- Default payment method: leave Manual Collection unless you have connected Stripe. Card and ACH collection need Stripe, which you connect in Settings.
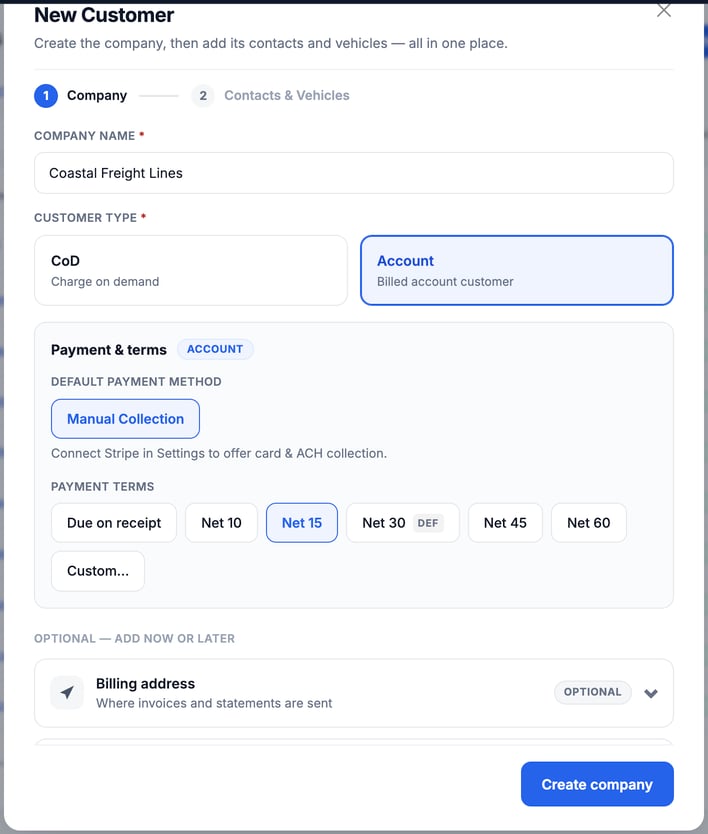
If you leave the payment terms unset, the customer follows your shop default. You set that default under Settings › Pricing & Rates › Payment Terms.
Add optional details
Both sections are optional. You can add them now or later from the company page.
- Billing address: where invoices and statements are sent. Enter the recipient, address, city and country. Whatever you fill in is saved, and you can finish it later.
- Advanced options: pick the Brand identity that controls the logo and details on this customer's invoices and emails. Enter an Auto-approval threshold in dollars. Estimates under this amount are approved automatically without manual review. You only see this field if your role has the bypass-threshold permission.
Click Create company.
The threshold only matters when the customer approval gate is on. See Auto-Approval Threshold and Understanding the Approval Gates.
Add the first contact
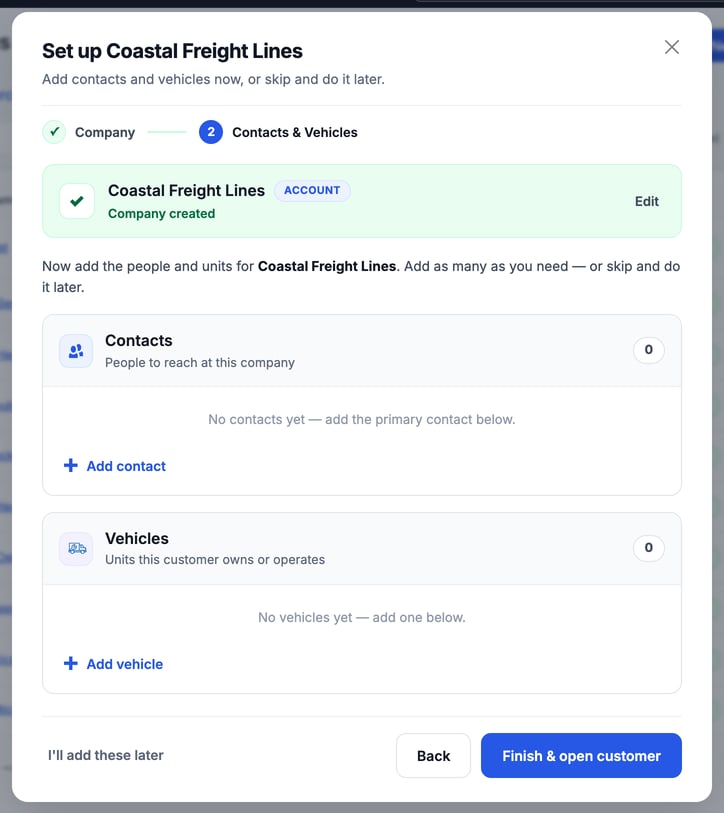
The window moves to step 2. It shows Company created, with Contacts and Vehicles below.
- Under Contacts, click Add contact.
- Enter the Full name, Email and, if you have it, Phone.
- Pick one or more Roles, then click Add contact.
You need Manage customers to give a contact a role or change one.
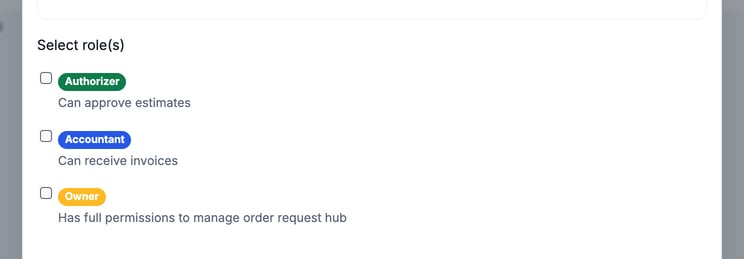
The roles are:
- Authorizer: can approve estimates.
- Accountant: can receive invoices. Invoices go to every contact with this role, even if they aren't on the order. If nobody has it, they go to the contacts on the order.
- Owner: has full permissions to manage the order request hub. On an Enterprise company, the owner also gets estimate and invoice emails and can approve on orders they are on, even without the other roles.
Add vehicles here too if you want, or click I'll add these later. When you are done, click Finish & open customer. For more on contacts, see Setting Up Contacts for End Customers.
Check the company size
The company page opens on the Details tab. New companies start as Individual. If the customer has several people or departments, change it:
- Next to Company Size, click Edit.
- Choose Enterprise or Individual.
- Click Save.
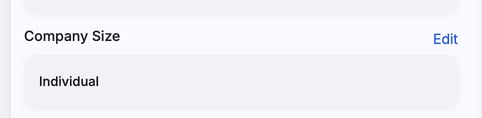
The size changes who can approve estimates. In an Individual company, every contact can approve. In an Enterprise company, only contacts with the Authorizer role and the company's owner can. Estimate emails go only to contacts with a valid email, and for an enterprise customer only to those with Authorizer or the owner.
Change terms or the threshold later
On the Details tab, click Edit next to Customer Type and Terms to switch between CoD and Account or change the terms. Click Edit next to Auto-Approval Threshold to change the amount. The card only shows if your role has the bypass-threshold permission.
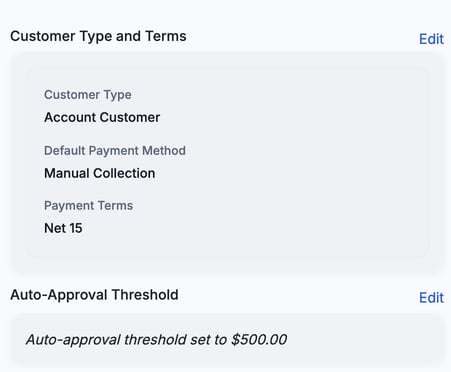
Click Edit next to Company Details to change the name or add a logo. The customer is ready for service orders once the company exists.
Set the customer timezone
The Details tab has a Customer Timezone card. It sets the time zone used for dates on this customer's invoices, statements, receipts, PDFs and emails. If it is empty, the card shows Tenant default and your shop's zone is used.
- On the Details tab, click Edit next to Customer Timezone.
- Pick the customer's zone and click Save.
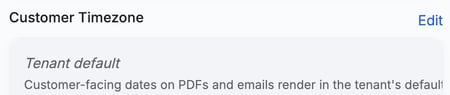
When you save a billing address in a different zone from your shop default, a Customer Timezone window offers that zone. Click Use <zone> to take it, or Keep tenant default. A zone you pick yourself shows a Locked tag, and later address edits don't change it. A zone taken from the address shows Auto. You need Manage customers to change it. Without it, Edit is greyed out.
Save job-site locations
Saved locations are the addresses where you repair this customer's vehicles, such as a yard or a depot. Open the company and click the Saved Locations tab. The list shows each Location, its Address and when it was Last Used.

- Add: click + Add Location. Type a Location Name such as North Yard, search for the address or pick it on the map, and add Access Notes if you want, such as a gate code or dock number.
- Edit: click Edit on a row to change the name or the access notes.
- Archive: click Archive on a row, then confirm. An archived location stops appearing in the saved address list when you create a service order or a PM appointment. Past orders keep the address they used. Archived rows stay in the list with a Restore button.
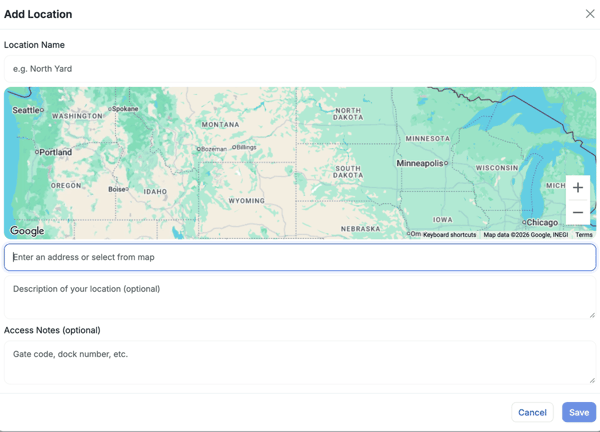
When you pick this customer on a new service order, the saved locations show as choices in the location step. Click one to fill in the address.
Archive or unarchive a company
Archive a company you no longer serve. Archived companies are hidden from company search and from the company pickers. Their service orders, invoices and history stay as they are.
You need Manage customers to see Archive and Restore; without Read customers, the company page says "You do not have permission to view this company."
- Open the company and click Archive on the company page.
- Read the message, then click Archive to confirm.
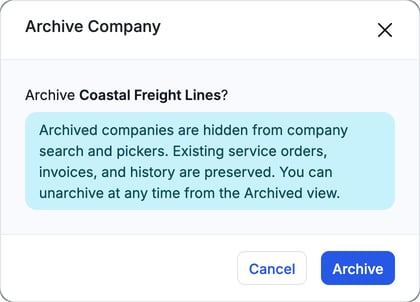
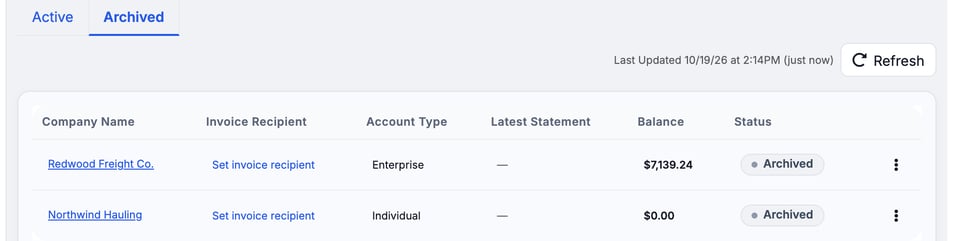
To find an archived company, open Company Details › Companies and click the Archived tab. Open the company and click Unarchive, then confirm. You can also use Restore in the row menu. The company shows up in search and pickers again.
Troubleshooting
| Symptom | Likely cause | Fix |
|---|---|---|
| The company isn't created | The company name is empty | Enter the name. It's the one required field in step 1. |
| I can't pick a role for a contact | The contact has no email | Enter an email first. Roles need one. |
| A contact's roles won't save (Permission denied) | Your role lacks Manage customers | Ask an admin for Manage customers. |
| The estimate email doesn't reach anyone at an enterprise customer | No contact on the order has the Authorizer role or is the company's owner, or the email is missing | Open the Contacts tab and give a contact with a valid email the Authorizer role. |
| Invoices show terms I didn't choose | The terms were left unset, so the shop default applies | Click Edit next to Customer Type and Terms and pick the terms you want. |
| Estimates still go to the customer even though they are small | The threshold was never saved, or the estimate total is above it | Check Auto-Approval Threshold on the Details tab. Estimates under it are approved automatically. |
| I can't find a company when I create an order | The company is archived | Open the Archived tab on the Companies page and unarchive it. |
| A saved location is missing from the order | The location is archived | Open the Saved Locations tab and click Restore. |
FAQs
What does "Enterprise" mean?
It marks a customer with several people or departments. Only contacts with the Authorizer role and the company's owner approve its estimates. A company set to Individual lets every contact approve.
Can I change payment terms later?
Yes. Click Edit next to Customer Type and Terms on the company's Details tab.
What happens if I leave the auto-approval threshold blank?
The shop's default threshold applies instead. If that is also blank and the customer approval gate is on, the customer approves every estimate. See Auto-Approval Threshold for how the two thresholds work together.
Can I delete a company?
Archive it instead. Open the company and click Archive. Orders, invoices and history are kept, and you can unarchive the company any time from the Archived tab on the Companies page.