
For: Admins and fleet coordinators · Time: ~5 minutes · Permission: a view-only user can open the Vehicle Types tab but can't save changes
Quick summary
- Open Settings › Service Catalog › Vehicle Types.
- Turn on the asset types your shop services and pick a Default type.
- Turn on Auto-generate unit numbers if you want new vehicles pre-numbered, then click Save.
- Create vehicle groups per customer under Company Details › Vehicle Management › Groups of Vehicles.
Before you start
- You need permission to change settings. If you don't see Service Catalog, or Save stays unavailable, ask an admin.
- Vehicle groups belong to one customer, so the customer must already exist under Company Details › Companies.
Choose your asset types
- Go to Settings › Service Catalog and click the Vehicle Types tab.
- On the Asset types card, switch on each type your shop works on: Truck, Trailer, Tractor, Heavy Equipment, Other and Dolly.
- Switch off the types you don't service. They disappear from the type picker when someone adds a vehicle.
- Open the Default type list and pick the type most of your vehicles use. The list offers only the types that are switched on, and switching off the current default resets it to No default. New vehicles start with the default selected. Leave it on No default if you'd rather choose each time.
- Click Save.
To check the result, click Preview on vehicle form on the card. It opens the Create Vehicle form.
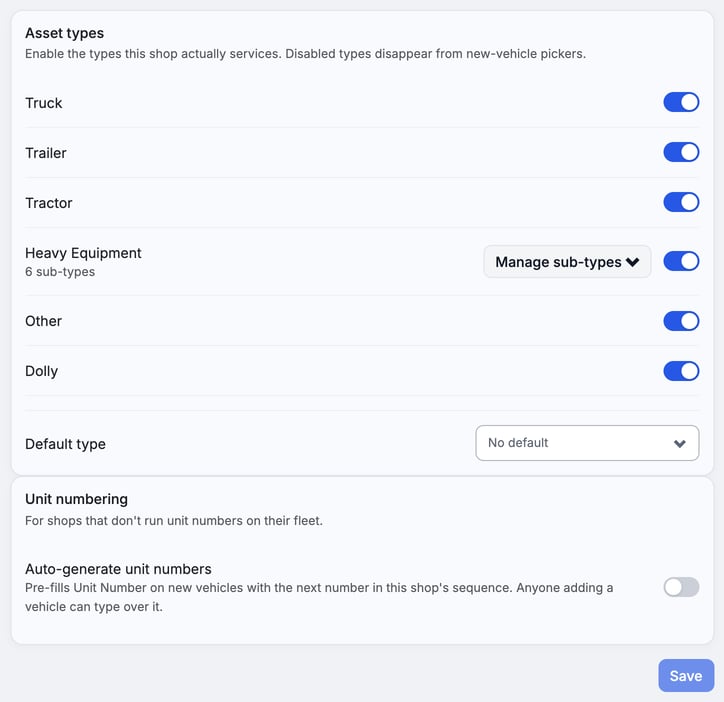
Vehicles you already have keep their type when you switch it off. The type just stops appearing on new vehicles. A change applies the next time someone adds or edits a vehicle.
You can't switch off every type. Keep at least one on, or Save stays unavailable.
Manage Heavy Equipment sub-types
When Heavy Equipment is on, a Manage sub-types button appears next to it. Sub-types show up as an optional list on the vehicle form once someone picks Heavy Equipment.
- Click Manage sub-types.
- Type a name in Add a sub-type… and click Add, or use the pencil to rename one, or the trash can to remove one.
- Click Save at the bottom of the page. Sub-type changes are not applied until you save.
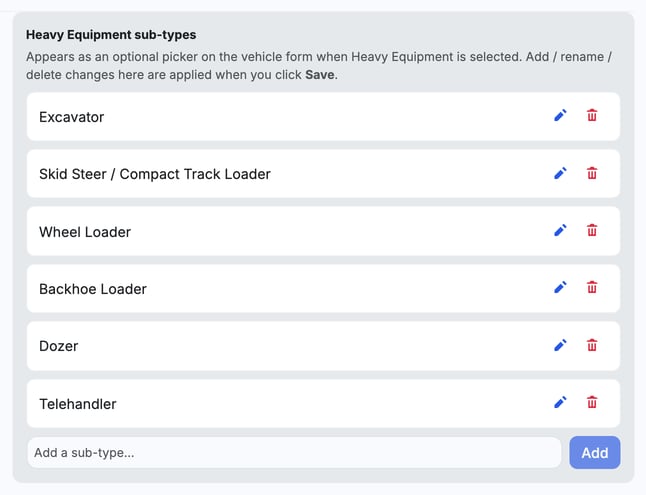
If vehicles already use a sub-type, removing it archives it instead. Open Archived (N) and click Restore to bring it back. A sub-type no vehicle uses is deleted.
Decide how unit numbers are filled in
The Unit numbering card, below the asset types, has one switch: Auto-generate unit numbers.
- Off: whoever adds a vehicle types the Unit Number. The field is required on the vehicle form.
- On: Unit Number is pre-filled with the next number in your shop's sequence, in the format V-000123. The count runs across the whole shop. Anyone adding a vehicle can type over it.
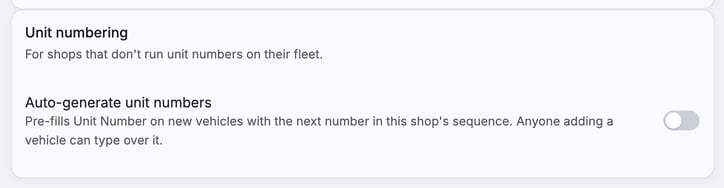
Click Save after you change the switch. The card's own subtitle describes shops that don't use unit numbers; the switch is what decides the behavior.
Here is where the unit number is entered when you add a vehicle with + Create vehicle on Company Details › Vehicle Management:
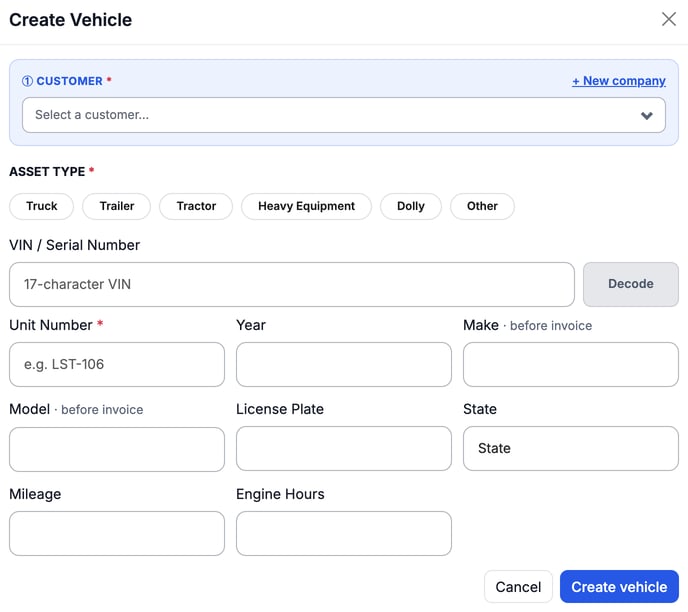
To fill in make, model and year from a VIN, see Auto-Fill Vehicle Details from the VIN.
Create a vehicle group
A vehicle group is a named set of one customer's vehicles. You can pick a whole group when you schedule a preventive maintenance (PM) appointment, and you can enroll the group in a PM program as you create it.
- Go to Company Details › Vehicle Management and click Groups of Vehicles.
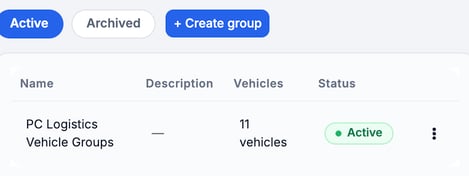
- Under CUSTOMER, pick the customer. Their existing groups are listed, with Active and Archived filters.
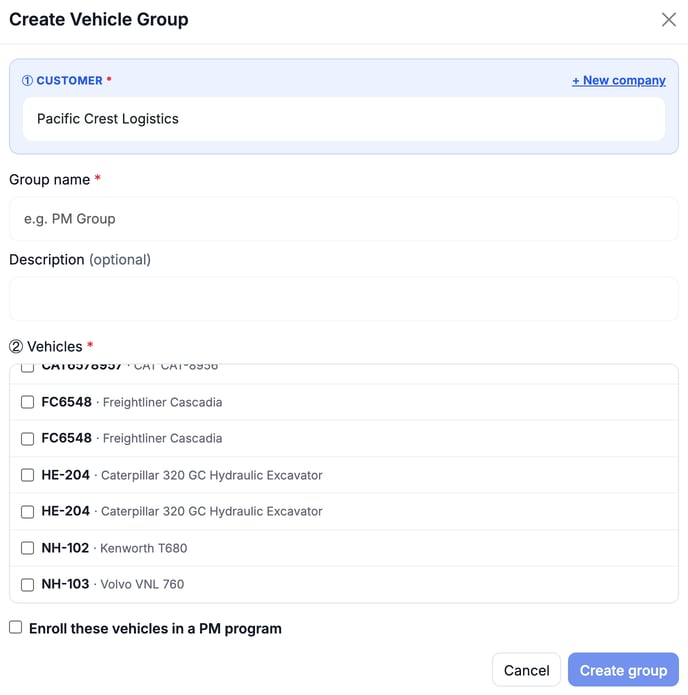
- Click + Create group.
- Enter a Group name. Add a Description if you like.
- Under Vehicles, tick each vehicle to include, or tick Select all.
- To enroll them in a PM program now, tick Enroll these vehicles in a PM program and choose the program. See Enrolling Vehicles in a PM Program.
- Click Create group. If you enrolled the vehicles, the button reads Create group & enroll.
Only vehicles that are active for that customer appear in the list. To bring back an archived vehicle first, see Manage Vehicles: Archive and Restore.
Troubleshooting
| Symptom | Likely cause | Fix |
|---|---|---|
| A type is missing when adding a vehicle | The asset type is switched off | Switch it on under Vehicle Types and click Save. |
| I can't click Save | Nothing has changed, or every type is switched off | Make a change, and keep at least one type on. |
| Unit Number is empty on a new vehicle | Auto-generate unit numbers is off | Type the number, or switch on auto-generate. |
| The group list says "This customer has no active vehicles." | The customer has no active vehicles | Add a vehicle for that customer, then create the group. |
FAQs
Does switching off a type delete vehicles of that type?
No. Existing vehicles keep the type. It only stops appearing on new ones.
Can I change an auto-generated unit number?
Yes. The number is a pre-fill. Type over it before you create the vehicle.
Can I edit or archive a group later?
Yes. Use the ⋮ menu on the group's row on the Groups of Vehicles tab.
Can a group include vehicles from two customers?
No. You pick one customer first, and the list shows only that customer's vehicles.