
For: Admins · Permission: Manage account settings · Time: ~2 minutes
Quick summary
- Go to Settings › Service Catalog and open the Repair Types tab.
- Click + Add Repair Type.
- Enter a Name and the Estimated service time (min and max, in minutes).
- Pick an Icon.
- Click Add Repair Type.
Before you start
- You need permission to manage account settings. Users with read-only access can open the list and the windows, but saving fails.
- Have the service name and a realistic time range ready, for example "Glass & Windshield Repair: 45–120 minutes".
- Customers see the same list on the request form, so use names they understand.
- Choose the icon that fits best. You pick from 15 built-in icons: Preventative, Electrical, Engine, Diagnostics, Brakes, Belt, Jump Start, Lockout, Inspection, EV Diag, Electronics, Mobile, Towing, Roadside and Other. You can't upload your own.
Open the Service Catalog
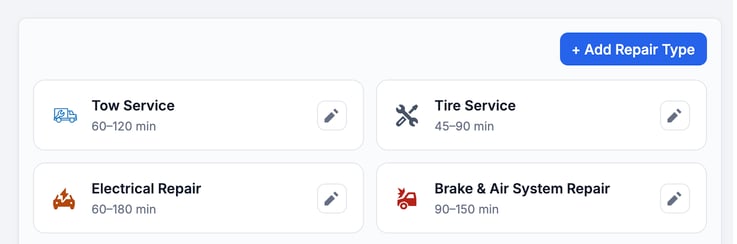
Click Settings, then Service Catalog under Catalog. The Repair Types tab opens first. Each repair type is a tile with its icon, name and estimated time range. The Vehicle Types and Job Catalog tabs sit below it.
Add the repair type
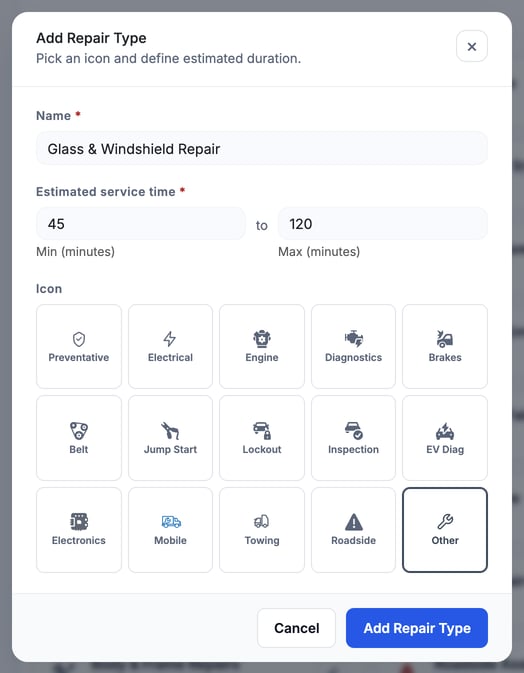
- Start. Click + Add Repair Type at the top right of the tiles.
- Name it. Enter a name of 3 to 32 characters, for example Glass & Windshield Repair.
- Set the time. Under Estimated service time, enter the shortest time in Min (minutes) and the longest in Max (minutes), for example 45 and 120.
- Choose an icon. Click one under Icon. The selected icon gets an outline in its own color.
- Save. Click Add Repair Type. The new tile appears at the end of the list until you reload the page. A tile you edit moves to the end the same way.
Technicians' Services Provided list on their user page uses the same repair types. Add the new type there for the technicians who do that work.
Edit a repair type
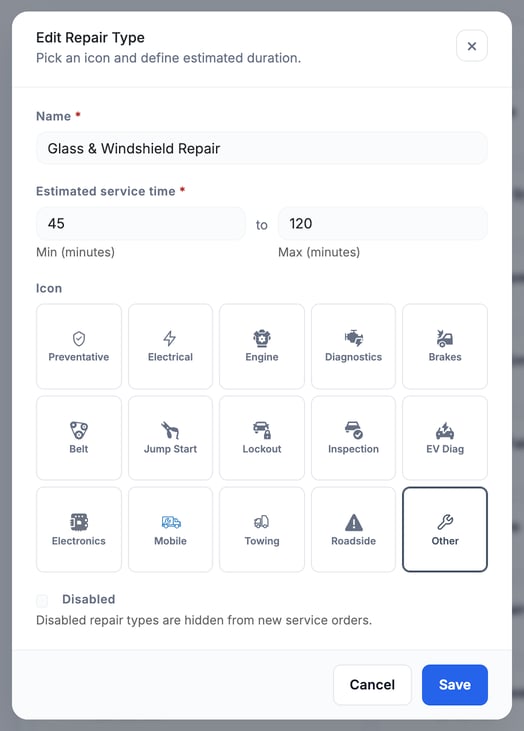
Click the tile, or the pencil on it. The Edit Repair Type window has the same fields. Change what you need and click Save.
Disable or re-enable a repair type
Open the repair type and check Disabled, then click Save. Disabled repair types are hidden from new service orders and from the customer request form. The tile stays in the list with a Disabled label. To bring it back, open it, clear Disabled and click Save.
You can't delete a repair type. Disabling is the way to retire one.
Troubleshooting
| Symptom | Likely cause | Fix |
|---|---|---|
| A repair type is missing when you create a service order | It is disabled | Open it under Settings › Service Catalog, clear Disabled and click Save. |
| The window shows an error and won't save | The name is shorter than 3 or longer than 32 characters, a time field is empty, or Max is lower than Min | Fix the name, fill in both Min and Max, make Max at least Min, and save again. |
| The wrong icon shows | A different icon was selected before saving | Open the repair type, click the right icon and click Save. |
| You get a permission error when you save | Your account can only read account settings | Ask an admin for Manage account settings. |
FAQs
Can I create location-specific repair types?
No. Repair types apply to your whole account.
Can I upload my own icons?
No. Choose one of the 15 built-in icons.
What happens to a repair type I no longer offer?
Disable it. It is hidden from new service orders and the customer request form, and can be turned back on at any time.
Where do I set labor rates?
Under Settings › Pricing & Rates. Repair types don't hold prices.