
Admins who set pricing policy. The markup matrix turns a part's cost into its customer price automatically, everywhere it's used.
What you'll learnHow the markup matrix works, how to set markup tiers for account and non-account customers, and how a single part can override the matrix when you need it to.
Before you start- You'll need: The Manage Account Settings permission. The matrix lives at Platform Settings → Account Details → Parts Markup.
- Two audiences: Account customers are your contract/fleet accounts (often better pricing). Non-Account are walk-ins.
Every part has a cost. The matrix applies a markup percentage to that cost — based on the customer type and the part's price range — to produce the price the customer sees. You set the policy once; it applies across estimates, invoices, and reporting automatically, and updates in real time when you change a tier.
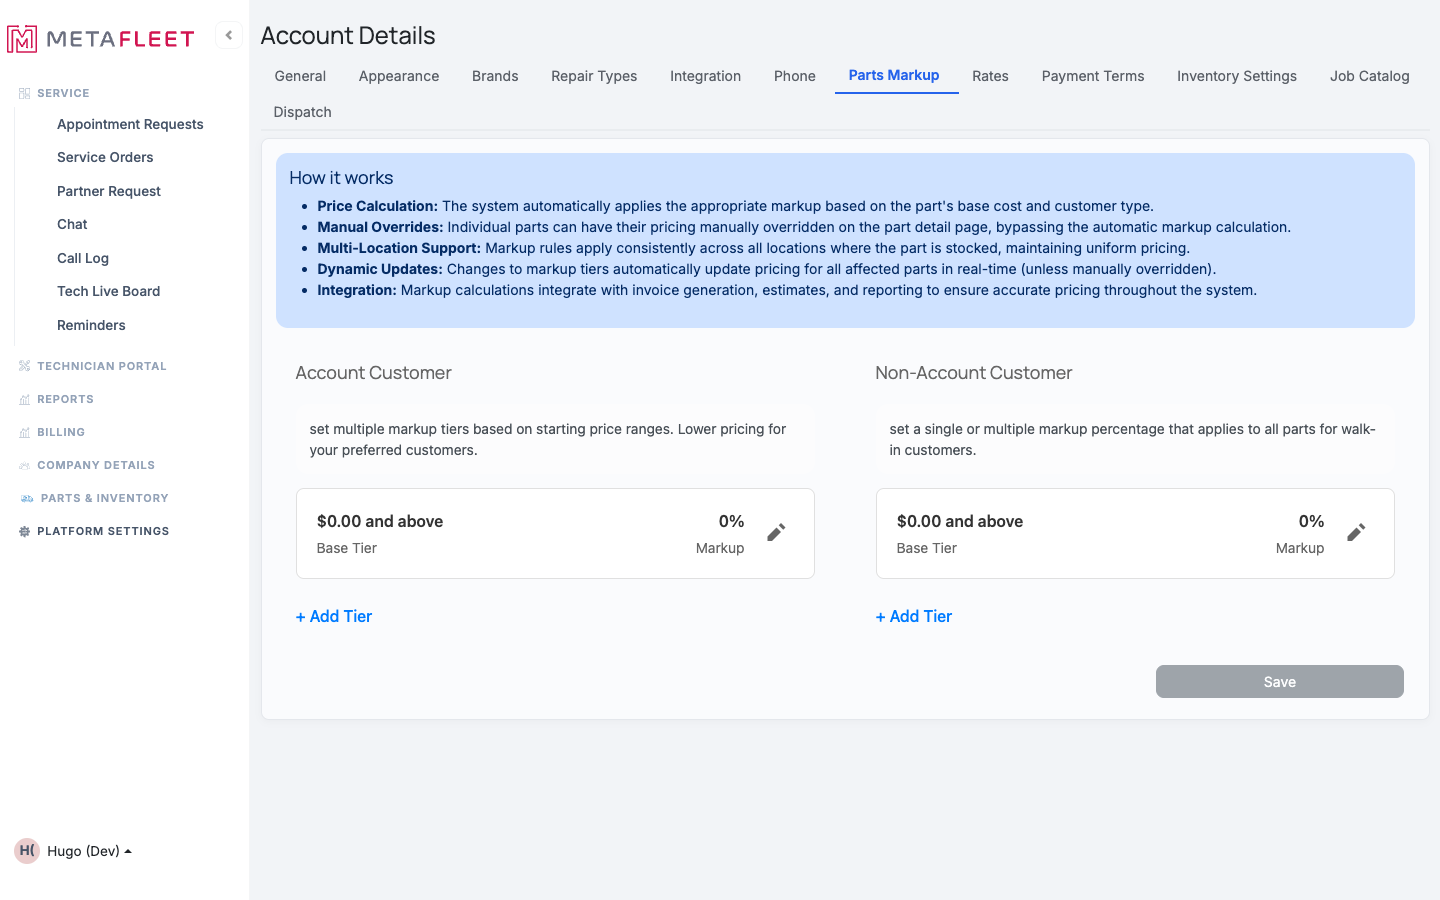
The markup matrix — separate tiers for Account and Non-Account customers, each starting from a base tier you can extend with price-range bands.
Step-by-stepOpen Parts Markup.
Go to Platform Settings → Account Details and click the Parts Markup tab.
Set the base markup.
Each customer type starts with a Base Tier ($0.00 and above). Click the pencil to set its markup percentage — the rate applied to every part unless a higher tier or override says otherwise.
Add price-range tiers (optional).
Click + Add Tier to charge a different markup above a starting price — for example, a smaller percentage on expensive parts. Tiers apply by the part's price range. Non-account pricing can be a single percentage or tiered, too.
Click Save.
Pricing updates everywhere immediately for all parts that follow the matrix.
Need a one-off price? On any part, turn on Manual Price Markup Override in its Edit window to set custom Account/Non-Account percentages just for that part — it bypasses the matrix. (See Editing Existing Parts.)Troubleshooting
| Symptom | Likely cause | Fix |
|---|---|---|
| A part's price equals its cost (0% markup) | No markup tier set for that range/customer type | Set the base tier percentage here, or use a manual override on the part. |
| One part is priced differently than the matrix | It has a manual override | Open the part's Edit window and turn off Manual Price Markup Override to follow the matrix again. |
| Account and walk-in prices are the same | Both customer types use the same percentages | Set a lower markup on the Account side to reward preferred customers. |
Does changing a tier affect existing invoices?
No — sent documents keep their prices. New pricing applies going forward.
What's a price-range tier for?
To vary markup by part value — e.g. a healthy markup on cheap parts and a slimmer one on expensive ones.
How do account vs non-account prices differ?
Each has its own markup percentages, so your contract customers can get better pricing than walk-ins automatically.