
Anyone organizing a warehouse or parts room. Once a location has stock, bins give every part a precise home — Rack A → Shelf 2 → Bin 4 — instead of just "somewhere in the building."
What you'll learnWhat bins are and why they help, how to find the bin setup on a fixed location, how to build your area/section/bin layout, how to place stock into a bin, where bin assignments show up afterward, and how to rename or remove parts of your layout.
Before you start- You'll need: A Fixed location (warehouse or parts room) with inventory-management access. Vehicle locations don't use bins.
- How it's shaped: Three levels deep: Area → Section → Bin. You can rename those labels to match your shop, but the depth stops at three.
Quick summary
- Open a Fixed location, go to the Settings tab, and pick Bins & organization.
- Click + Add Area (or + Add Multiple) to start your top level, then add sections and bins inside each.
- On the Stock tab, use a part's Move to Bin action to place it.
- The part's bin then shows in the Location column on the stock table.
Open the bin setup.
Open a Fixed location (from Inventory Locations, pick a warehouse or parts room), go to the Settings tab, and choose Bins & organization in the left sidebar. The first time, you'll see a friendly start card inviting you to create your first area. (Shortcut: the Stock tab also shows a "Tip: You can organize this location into racks, shelves, and bins. Get started →" link that drops you straight here.)
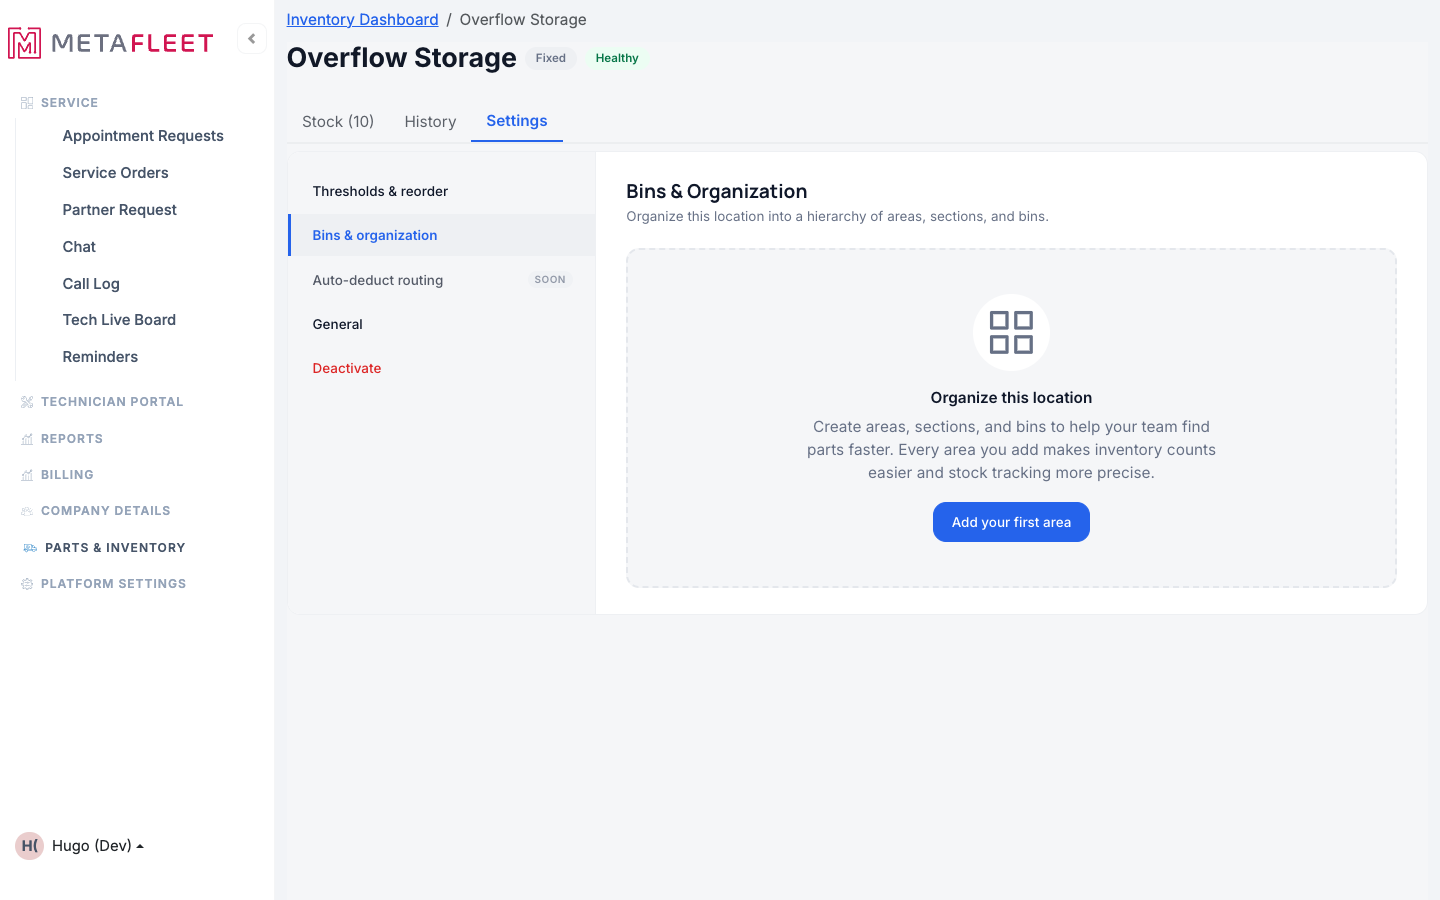
The empty Bins & organization section under Settings. The start card explains the payoff and offers Add your first area.
Add your top level.
Click + Add Area to create one area at a time, or + Add Multiple to add several at once. Give each a clear name (e.g. Rack A, Rack B). These sit directly under the location.
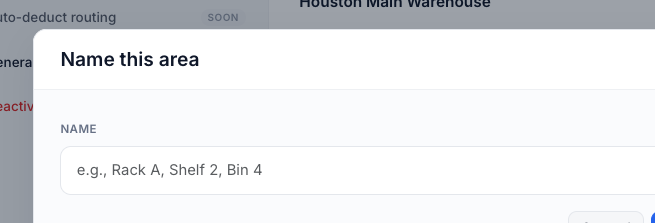
Naming a top-level area. Use + Add Multiple when you're setting up a whole rack run.
Nest sections and bins inside.
Each area shows an inline + button — hover it for "Add a spot inside…" — to add a section beneath it, then a bin beneath the section. To lay out a whole shelf run fast, open any non-deepest node's kebab (···) menu and choose Add Multiple to bulk-create children at once (any names that fail are reported; the rest still get created). The tree indents each level so the full hierarchy is visible at a glance. (Depth stops at three levels; the + disappears once you reach the deepest level.)
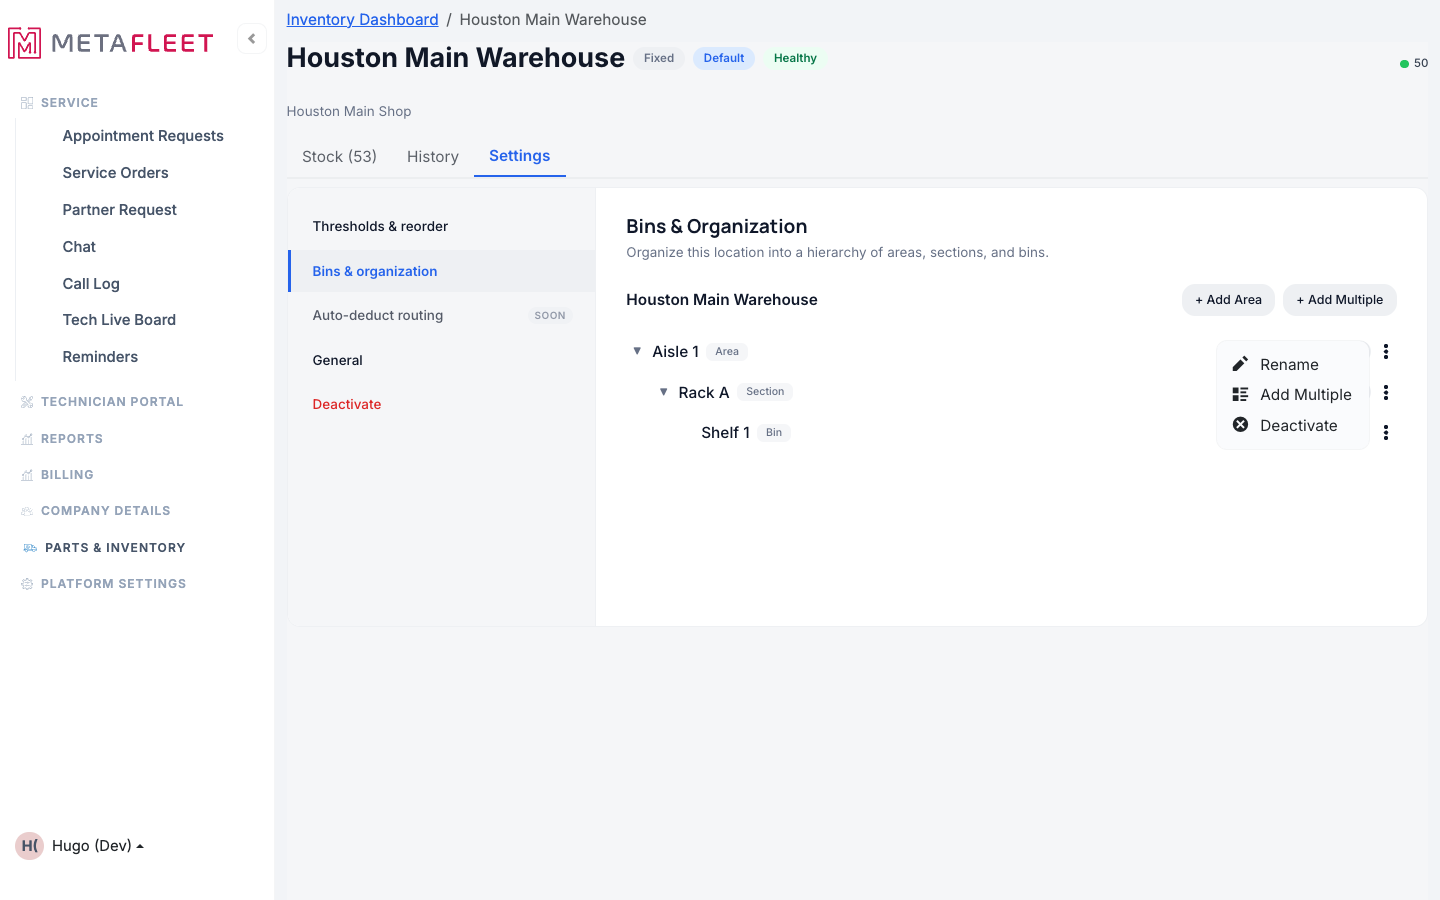
The bin tree: areas, sections, and bins with level badges, an inline +, and a kebab menu for rename, Add Multiple, and deactivate. Nodes with children show an expand chevron.
Place stock into a bin.
Go to the Stock tab. On any part's row, open the kebab (···) menu and choose Move to Bin. If some parts aren't placed yet, a banner near the top counts the unassigned ones and points you here.
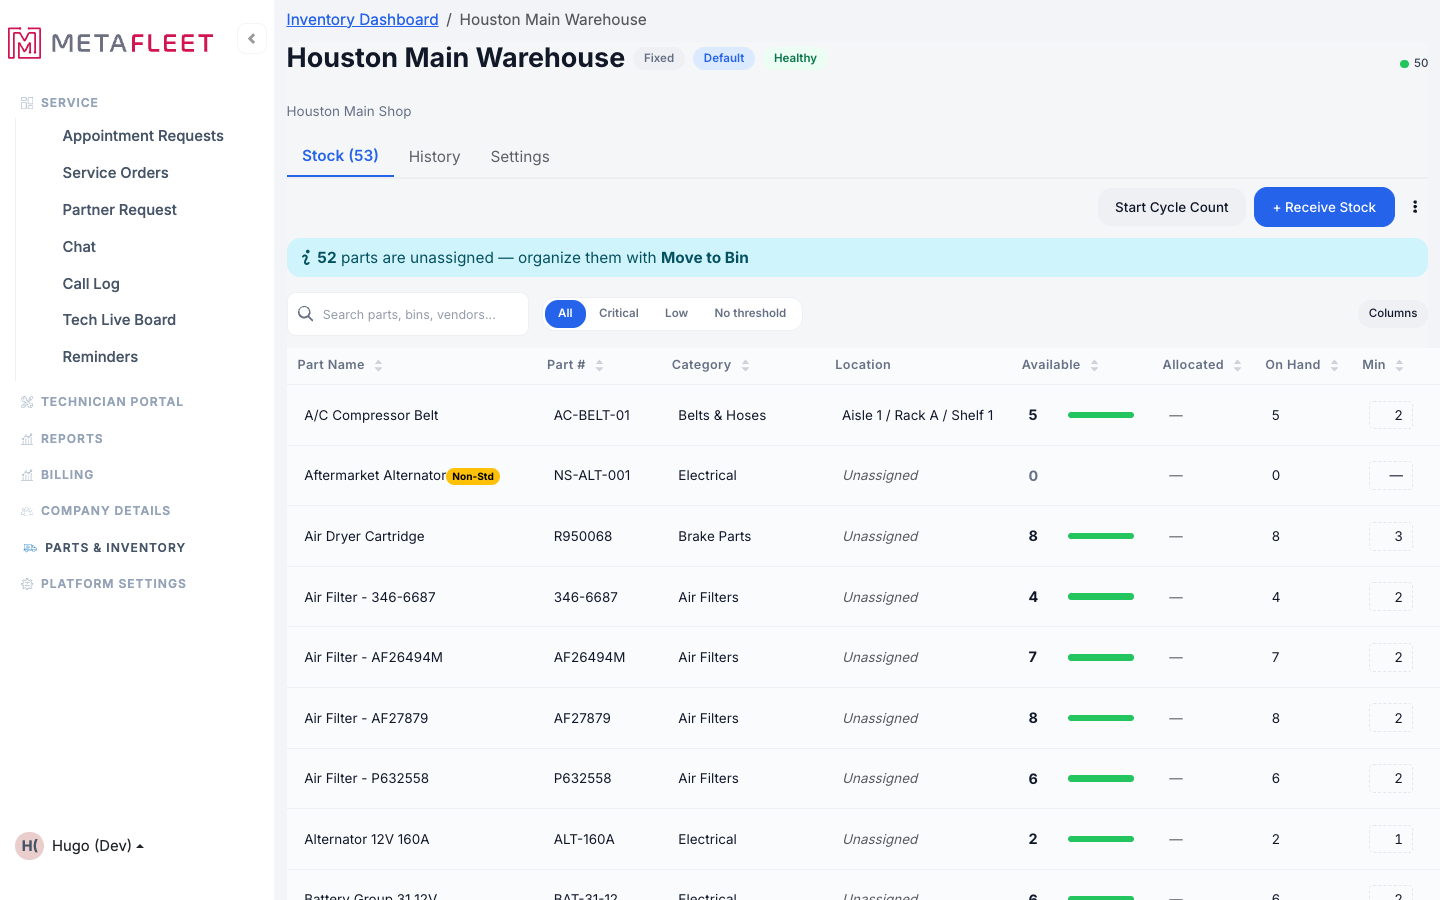
The Move to Bin action appears on the Stock tab once a location has bins.
Pick the target bin and confirm.
In the Move to Bin window, pick the destination from the bin picker and click Move. The window shows the part name and where it currently sits; Move stays disabled until you actually choose a different bin.
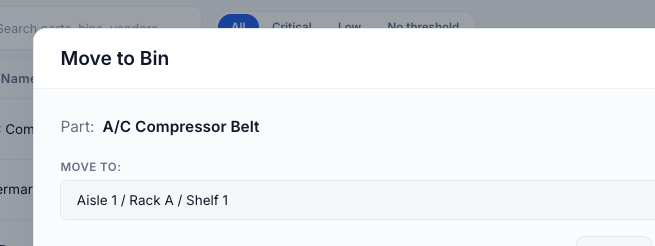
Choosing a destination. Currently in shows where the part lives now; pick a new bin and click Move.
See bin assignments afterward.
Back on the Stock tab, the Location column shows each part's bin path. Parts you haven't placed read Unassigned in muted italic. To show or hide that column, open the Columns dropdown and tick the Bin checkbox (it controls the Location column). Bin paths also appear as a small sub-label in the Thresholds & reorder view.
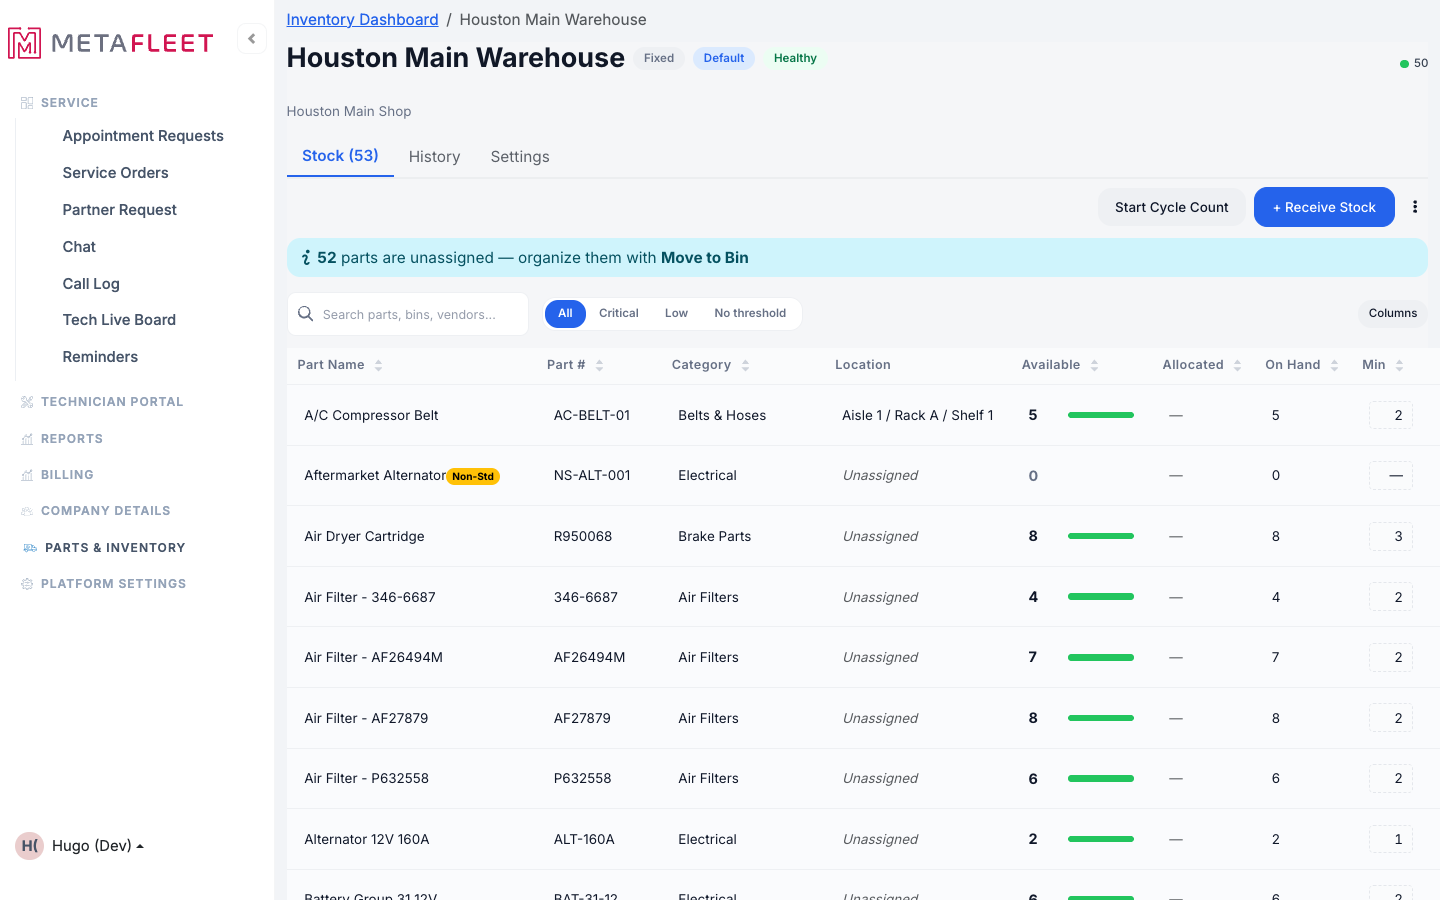
The Location column shows each part's bin path; unplaced parts read Unassigned.
Rename the level labels to match your shop. The default Area / Section / Bin labels are yours to change. On the location's Settings tab → General, the Organization Labels fields let you rename all three (leave a field blank to keep the default). The new names flow through the tree's nodes, badges, and headings.Renaming and removing
Every bin's kebab (···) menu gives you the right options for its state:
- Rename — change a bin's name without disturbing what's inside it.
- Deactivate — retire a bin you're no longer using. It greys out and is hidden from the bin pickers, but its stock history is preserved. If the bin still holds stock, you'll be asked to Move & Deactivate — the system moves that stock up to the parent (or to unassigned for a top-level area) and then retires the bin.
- Delete — once a bin is deactivated, its menu offers Delete to remove it for good. You can't delete an active bin directly; deactivate it first.
| Symptom | Likely cause | Fix |
|---|---|---|
| There's no Bins & organization item under Settings | Bins are for Fixed locations only | Open a warehouse or parts room (a Fixed location). Vehicle locations don't use bins, so the item is hidden. |
| The + to add a child is missing on a bin | It's already at the deepest level | The hierarchy stops at three levels (Area → Section → Bin). Add the part there directly. |
| I can't delete a bin — only Deactivate shows | The bin is still active | Choose Deactivate first; once retired, its menu shows Delete. |
| Deactivating won't go through | The bin still holds stock | Confirm Move & Deactivate — stock moves to the parent (or unassigned), then the bin retires. |
| The Move button is greyed out | You picked the bin the part is already in | Choose a different destination — Move enables once the target changes. |
| There's no Bin column or Move to Bin action | The location has no bins yet | Build a layout under Settings → Bins & organization first; the bin tools appear once bins exist. |
How deep can my layout go?
Three levels: an Area, a Section inside it, and a Bin inside that. You can rename those labels, but the depth stops at three.
Can I rename Area, Section, and Bin?
Yes — on the location's Settings tab under General → Organization Labels. The names you set apply across your account; leave a field blank to keep the default.
What happens to stock when I deactivate a bin?
If the bin holds stock, you confirm Move & Deactivate and the system moves that stock to the bin's parent — or to unassigned if it was a top-level area — before retiring it. The bin's history isn't lost.
What does "Unassigned" mean in the Location column?
The part is stocked at the location but hasn't been placed in a bin yet. Use Move to Bin to give it a home.
Do I have to use bins?
No. Without bins, stock simply lives at the location level. Bins are an optional layer that makes finding and counting parts faster.